Using the Segments Tab
The Segments tab provides features for viewing time-based metadata of Avid Production Management or MediaCentral Production Management and Asset Management video assets. Time-based metadata include:
-
(Production Management) A marker is an indicator added to a selected frame to mark a particular location in a clip. Markers can have icons of different colors and can be associated with user-defined comments.
-
(Production Management) A restriction is a span of an asset that indicates a clip, or a portion of a clip, whose use is limited in some way, such as through intellectual property rights management or content compliance.
For more information, see Inspecting Markers and Restrictions.
-
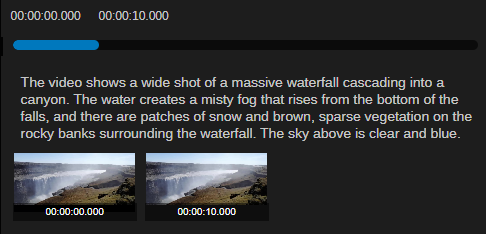
Content Description: This layer shows AI generated descriptions of your video assets.
For more information, see Inspecting Content Descriptions.
-
Temporal Hits: The Temporal Hits layer provides information about the location of semantic matches that are returned through a semantic search (Simple) and of segments that are returned through a Markers & Segments search (Advanced). Results are displayed by relevance-ordered rows of data.
For more information, see Inspecting Temporal Hits.
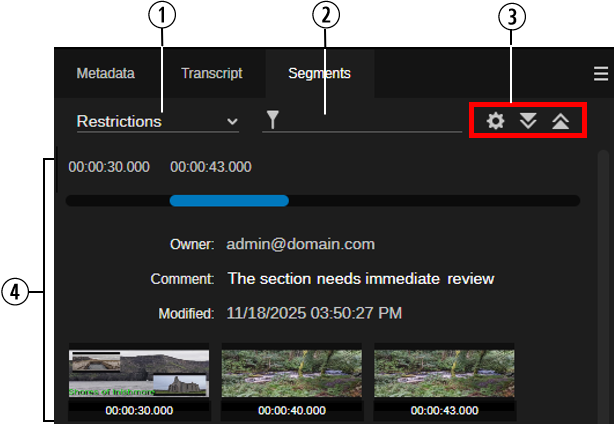
The following illustration and table describe the layout of the Segments tab for the All Markers layer.
|
|
Display or Control |
Description |
|
1 |
Layer selector |
Lets you select the layer for which information is to displayed in the Segments tab.
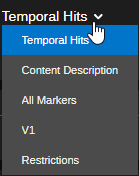
The layer selection control shows the layers that are available for the asset open in the Segments tab. If a layer is not available for the asset, the corresponding entry is not shown in the layer selection menu. The following layers can be shown:
n You cannot show more than one layer at the same time. When you switch between assets during your session, the top-most entry in the layer selection control is selected. |
|
2 |
Filter control |
Lets you filter the segments shown in the Segments tab. n The Filter control is available for the Markers, Restrictions and Content Description layers but not for Temporal Hits. For more information, see Inspecting Markers and Restrictions and Inspecting Content Descriptions. |
|
3 |
Thumbnail controls |
Let you control the display of the thumbnails that are shown for segments (from left to right):
The controls are not available for Markers. For more information, see Using Thumbnails. |
|
4 |
Segments |
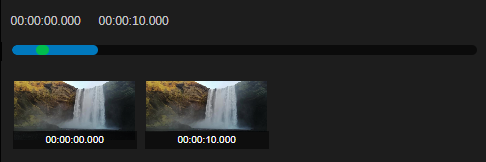
Information on the asset open in the Segments tab is shown in segments. Each segment represents a marker or a restriction, description segment, or a temporal hit segment. Which information is shown depends on the layer selected from the layer selector control. |
|
|
|
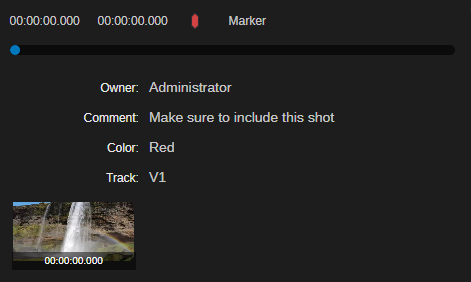
For markers, the segments are arranged by In timecode, from lower to higher. Timecodes are displayed as HH:MM:SS.mmm. Each segment shows the following data:
For more information, see Inspecting Markers and Restrictions. |
|
|
|
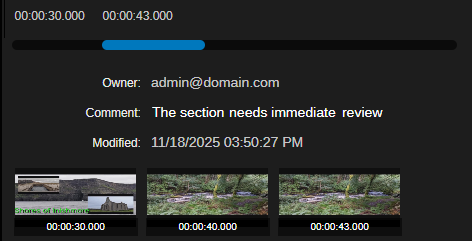
For restrictions, the segments are arranged by In timecode, from lower to higher. Timecodes are displayed as HH:MM:SS.mmm. Each segment shows the following data:
For more information, see Inspecting Markers and Restrictions. |
|
|
|
For content descriptions, the segments are arranged by In timecode, from lower to higher. Timecodes are displayed as HH:MM:SS.mmm. Each segment shows the following data:
For more information, see Inspecting Content Descriptions. |
|
For temporal hits, the segments are arranged by relevance, where the most accurate result is listed at the top of the list. Each temporal hit segment shows the following data:
For more information, see Inspecting Temporal Hits. |




To open an asset in the Segments tab:
-
On the Landing page, double-click an asset, then click the Player's Segments tab.
This assumes that the Player is the default app for this asset type.
-
Double-click an asset in the Search app and click the Player’s Segments tab.
This assumes that the Player is the default app for this asset type.
-
Right-click an asset in the Search app, and in the context menu that opens select Open in > Player and then click the Player’s Segments tab.
If you have not loaded an asset, the Segments tab shows an “Asset is not selected - Select an asset to view segments” message. If the asset does not have markers or restrictions, the tab shows a "We couldn't find what you're looking for - There isn't any timeline metadata on this asset" message.
To switch between layers:
-
Click the layer selector and select the layer you want to show.
If you already have selected a segment on a layer (and thus the position indicator is set to the corresponding timecode on the position indicator panel) and you then select another layer, a segment that includes the current timecode is automatically selected on the new layer. The segments list scrolls to the segment.
Inspecting Markers and Restrictions
Use the Segments tab's Markers and Restrictions layers to inspect the markers or restrictions that are added to a Production Management asset. In this version, you can view markers and restrictions in the Segments tab but you cannot add, edit or delete the time-based metadata.
To show markers or restrictions:
-
To show markers, click the layer selector and select the track for which you want to show markers.
Alternatively, select the All markers layer to show all markers from all tracks.
-
To show restrictions, click the layer selector and select Restrictions.
To filter markers or restrictions:
-
Click in the Filter field and start typing the term you want to use for filtering.
While you type, a "contains" search is applied; you do not need to type the entire term.
-
For markers, search is applied to the Color, Comment, Owner and Track fields.
-
For restrictions, search is applied to the Comment, Owner and Modified fields.
Only segments that include your search term are shown in the tab.
-
-
To remove the filter, click the X (Clear) button that is shown to the right side of the Filter field.
All markers resp. restrictions are shown again.
To copy Comment text to the clipboard:
-
Double-click on the Comment field.
-
Highlight the text you want to copy.
-
Press Ctrl+C.
You can then use Ctrl+V to paste the comment text to another document or application.
To navigate by markers or restrictions:
-
Click a marker or restriction segment in the Segments tab.
The position indicator on the position indicator panel is set to the In timecode of the marker or restriction.
Timecode in the Segments tab is displayed as HH:MM:SS.mmm. Given that the proxy media might be created at a different frame rate than the source asset, the final value is displayed in milliseconds to ensure that your In timecode applies to the most accurate frame of media.
-
Start playback.
When playback reaches the marker timecode or In timecode of a restriction, the segment is highlighted in gray. While playback continues, position indicator and highlighting update in tandem, the Segments area scrolls down the list of marker or restriction segments.
Inspecting Content Descriptions
Use the Segments tab's Content Description layer to inspect AI generated descriptions of your video assets.
To show Content Description segments:
-
Click the layer selector and select Content Description.
To filter Content Description segments:
-
Click in the Filter field and start typing the word you want to use for filtering.
While you type, a "contains" search is applied; you do not need to type the entire term. Only segments that include your search term are shown in the tab.
-
To remove the filter, click the X (Clear) button that is shown to the right side of the Filter field.
All segments are shown again.
To copy Content Description text to the clipboard:
-
Double-click on the text field in a segment.
-
Highlight the text you want to copy.
-
Press Ctrl+C.
You can then use Ctrl+V to paste the Content Description text to another document or application.
To navigate by Content Description segments:
-
Click a segment in the Segments tab.
The position indicator on the position indicator panel is set to the In timecode of the segment.
Timecode in the Segments tab is displayed as HH:MM:SS.mmm. Given that the proxy media might be created at a different frame rate than the source asset, the final value is displayed in milliseconds to ensure that your In timecode applies to the most accurate frame of media.
-
Start playback or move the position indicator in the position indicator panel.
When playback reaches the In timecode of a segment, the segment is highlighted in gray. While playback continues, position indicator and highlighting update in tandem, the Segments area scrolls up or down the list of Content Description segments.
Inspecting Temporal Hits
Use the Segments tab's Temporal Hits layer to inspect the location of semantic matches that are returned through a semantic search and of segments that are returned through a Markers & Segments search.
To show temporal hits in the Segments tab:
-
In the Search app, conduct a semantic search or a Markers & Segments search. See Using the Simple Search.
-
Do one of the following:
-
Double-click an asset in the Search app results list and click the Player’s Segments tab.
This assumes that the Player is the default app for this asset type.
-
Right-click an asset in the Search app results list, and in the context menu that opens select Open in > Player and then click the Player’s Segments tab.
-
The Temporal Hits layer is selected and all temporal segments returned by the search are shown in the Segments tab. Results are sorted by relevance.
To navigate by temporal hit segments:
-
Click a temporal hit segment in the Segments tab.
The position indicator on the position indicator panel is set to the In timecode of the best result within the segment.
Timecode in the Segments tab is displayed as HH:MM:SS.mmm. Given that the proxy media might be created at a different frame rate than the source asset, the final value is displayed in milliseconds to ensure that your In timecode applies to the most accurate frame of media.
-
Start playback or move the position indicator in the position indicator panel.
When playback reaches the In timecode of a segment, the segment is highlighted in gray. While playback continues, position indicator and highlighting update in tandem, the Segments area scrolls up or down the list of temporal segments.
Using Thumbnails
In the Segments tab, the thumbnails associated with each marker or restriction or segment are shown in addition to the text-based data. Each thumbnail is displayed with the corresponding timecode. By default, a thumbnail interval of 10s is enabled. When you select a thumbnail, it is marked with a blue frame. If the thumbnail for the timecode cannot be displayed, a placeholder icon is shown instead.

Thumbnail, selected thumbnail, thumbnail placeholder (left to right)
Note the following:
-
For each marker the assigned thumbnail is shown. For Restrictions, Temporal Hits and Content Description segments, at least the start and end frame of the segment are shown. More thumbnails can be shown depending on the length of the restriction/segment and the applied thumbnails filter.
-
Per segment, not more than two thumbnail rows are displayed by default. If there are more thumbnails available for the segment, a Show More button is shown at the bottom of the segment. If you increase the Player width so that all thumbnails can be displayed within two rows, the Show More button is hidden.
-
Expand All and Collapse All buttons let you show and hide more thumbnail rows for all affected segments at the same time. The buttons are not available for Markers.
-
The thumbnail selection is retained when you switch to another layer and back and when you load another asset during you current user session; it does not retain across your user session.
To show and hide more thumbnails for an individual segment:
-
 Click the Show More button at the bottom of the segment.
Additional thumbnail row(s) are displayed.
-
Click the Show Less button at the bottom of the segment.
The additional rows are collapsed and only two thumbnail rows are shown for the segment.
To show and hide more thumbnails for all segments:
-
 Click the Expand All button on the toolbar.
Additional thumbnail row(s) are displayed for all segments.
-
 Click the Collapse All button on the toolbar.
For all segments, the additional rows are collapsed and only two thumbnail rows are shown.
To change the thumbnails interval:
-
 Click the Thumbnails Interval button.
 -
Hover the mouse over Thumbnails Interval and in the menu that opens select the frequency you want to apply (10s, 1m, 5m, 10m).
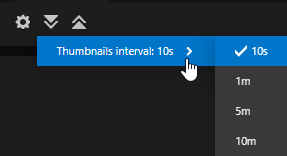
The currently applied option is shown in the menu. By default, 10s is selected.
To navigate by thumbnail:
-
Click on a thumbnail.
The thumbnail is highlighted with a blue border.
The corresponding frame is shown in the Player.